MojoWorld – Nearspace
Pandromeda
UX + UI + IA .:. 2000

Product
MojoWorld – Nearspace was the full MojoWorld product. It enabled users to build worlds from scratch or from starter worlds, and mold the fractal noise basis functions for the entire planet. In the “Generator” mode, planets could be created and authored for the entire set of parameters, functions, textures, materials, satellites, atmosphere, land and water. The underlying complexity of the worlds were encapsulated in “states” and published with each planet. The states enabled worlds to be controlled by the Transporter package in the “Hyperspace mixer”.
Main Window
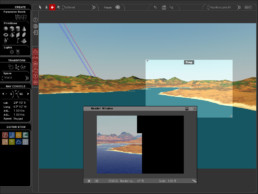
Nearspace Main Window with a floating render window.
The Main window of MojoWorld – Nearspace consisted of the Tools panel on the left, with the main GL View of the current state of the world on the right. The Tools panel contained the following Panes:
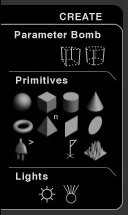
Create pane – objects which could be added to the planet
Transform pane – transformation tools for selected objects in the view
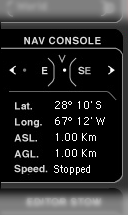
Nav Console – controls for the current camera in the GL view
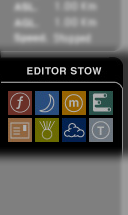
Editor Stow – A location to stow minimized editors for functions of the planet, terrain, objects etc. This provided a way to keep frequently edited objects available yet minimized, and out of the way of the main view.
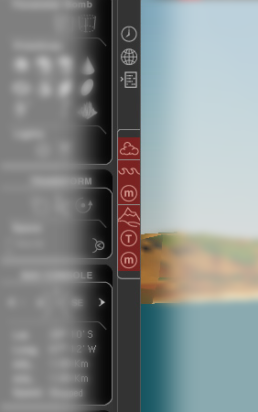
Between the Tools panel and GL View, the Global Object Selectors were stacked vertically to provide quick access to their editors. These Global Objects provided access to the following editors:
- Time
- Planet
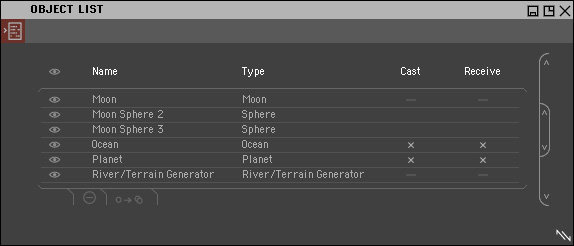
- Object List
- Sky
- Water
- Water Material
- Terrain
- Heightfield Texture
- Material
World Editing
Procedural object editing for artistic output involves frequent interaction with multiple parameters. Workflows involve a high amount of tuning on any set of parameters intrinsic to the loaded scene. To address this challenge, the functional design of the Generator interface was intentionally more flexible than Transporter. Artists were free to arrange their editors to best suit their needs, closing or storing editors to speed their workflow as desired.
The workflow for editing worlds was streamlined to a tap and edit flow. Tapping an object such as terrain, sky, object materials, etc, would open an editor as an independent window which controls that object in the currently loaded world. Material, Texture, Function, Gradient, and Curve Editors were generic editors accessed via one of the higher level objects in the world. Each time one was opened, it was bound to the controls of the object which launched it.
The choice to not have a fixed attribute editor which changed based on a selection was intentional. No attribute editor panel was tied to a user directed global selection. This resulted in a “selection free” approach where attribute editors remained active for an object until it was closed. It allowed an artist to simultaneously edit multiple objects or textures in the scene without selecting and re-selecting objects to perform the same edits. Multiple parameter editors could be placed on the desktop side by side providing a dynamic and highly customizable editing experience for the artist. Additionally these editors could be “stashed” for quick access, independent of selection, to enable artists to tune their worlds efficiently regardless of underlying scene complexity.
Controls
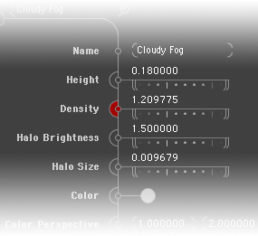
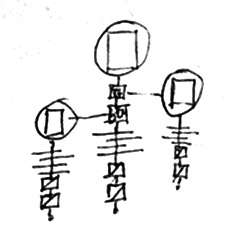
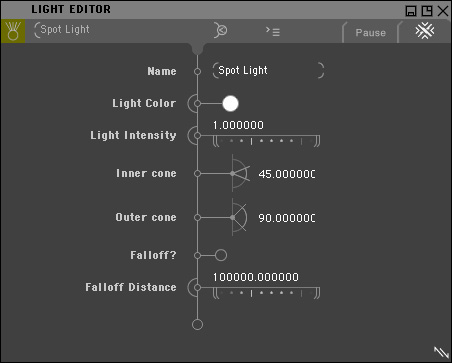
The design language for parameter editing relied on a visual “stem” connecting the attributes to an object highlighted in the window’s header. This visual connection device was maintained throughout the GUI when an attribute editor was displayed. On the stem, each component displayed it’s title on the left, was connected to the stem in the center, displaying a control widget on the right. A total of 12 components were created for parameter control. The following illustration shows the component names on each control.
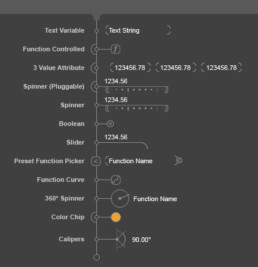
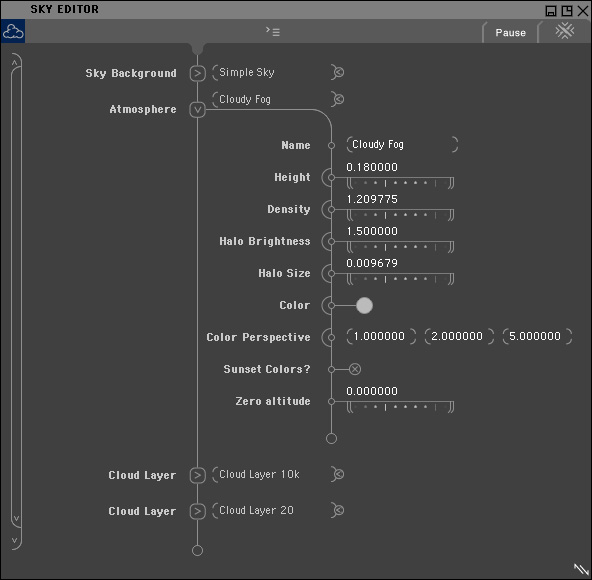
If an attribute could be controlled by a function or texture (pluggable), the capability was represented by a larger half-circle around the connection to the stem. Clicking the half circle would allow the user to apply a function or texture to the parameter. This is visible in the following illustration with the “Density” parameter having a texture or function driving the density evaluation. Tapping the red half-circle launches the appropriate editor.
Collapsible branches of the stem were also included in the design language. Though branches were set to expand to a pre-defined size, the regions of the stem could be scrolled independently when overflow of a region occurred such as user entered text.

Sky Editor showing collapsed and expanded branches of the stem with controls exposed
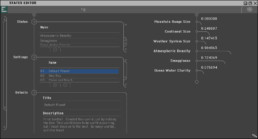
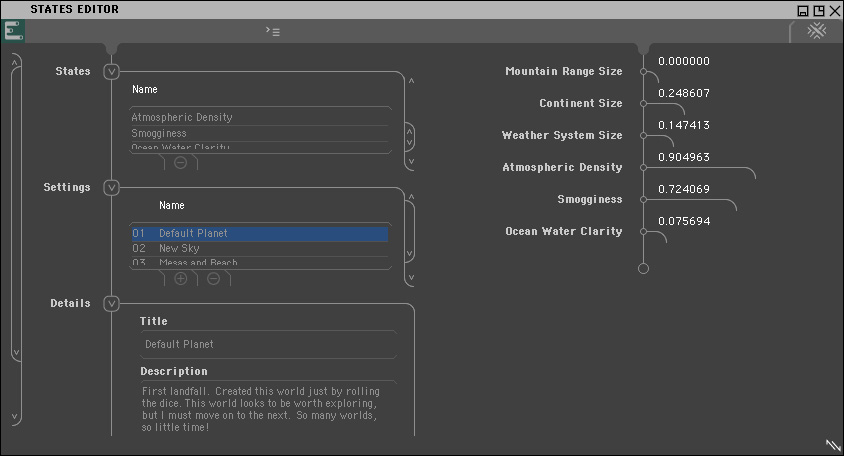
States Editor showing lists within expanded branches of the stem.
The following sketches for component design language show the evolution of tool function and structural framework of several view / control approaches.
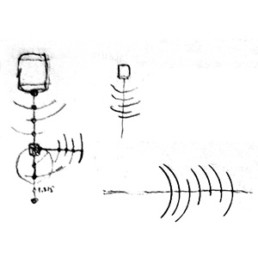
1. Early sketches – Radial sliders
2. Radial sliders and curve functions
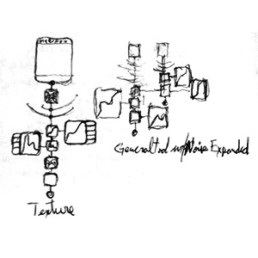
3. Branching Controls and Noise functions
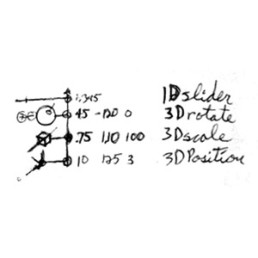
4. Concept sketch for individual controls
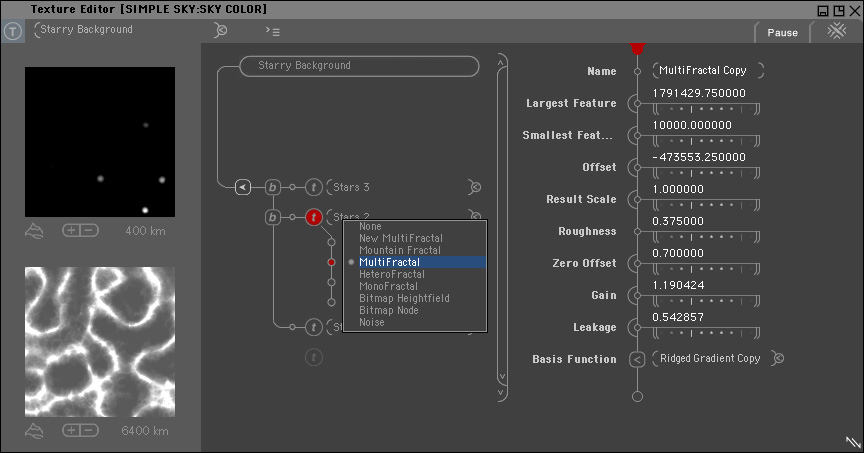
Materials and Textures
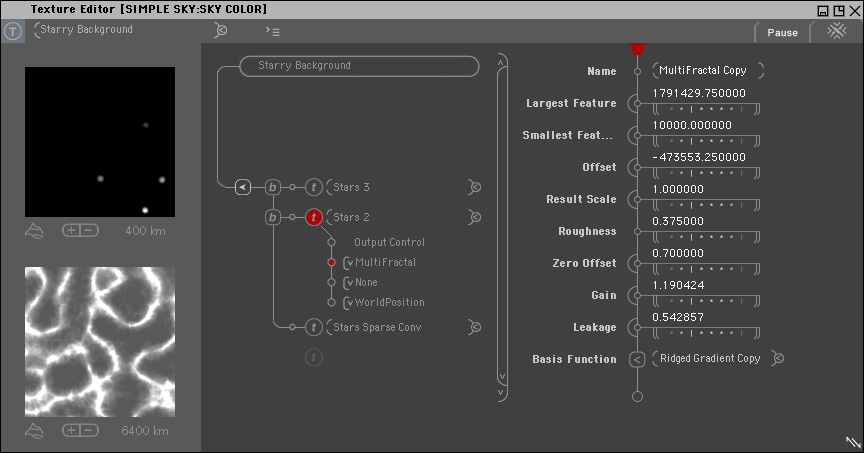
Materials are what renders the final color of geometry in a scene. Textures are functions which are used for a large number of operations: everything from geometry creation, as when creating fractal terrain, to cloud patterns. Materials typically use Textures, apply color to them, taking them from a grayscale value to a color. Materials also integrate geometry projection to a camera, atmosphere, and lighting to determine their color. Both Materials and Textures can be blended in complex graphs to produce highly variable and artistic effects. Since the workflow was largely the same with only minor variance in the details of each type of graph, we chose one basic workflow for both.
But will it blend…
The Material and Texture editor was a unique challenge to enable some flexibility within a fixed set of choices. Generator was intended to have some flexibility but not require extensive node graph editing for basic material and texture editing. We explored typical blend node approaches and layering approaches to material and texture creation. After studying various types of graph networks, two distinct patterns emerged: symmetrical branching graphs and spine based graphs.
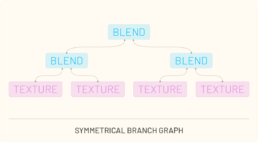
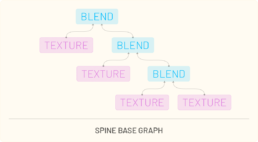
We were able to achieve a highly flexible framework using a fixed set of 4 textures and 3 blends, and adding the ability to switch between the two types. Using this approach, all materials and textures could be created for the product.
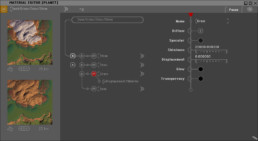
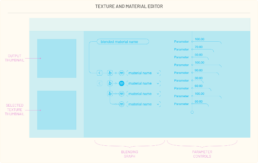
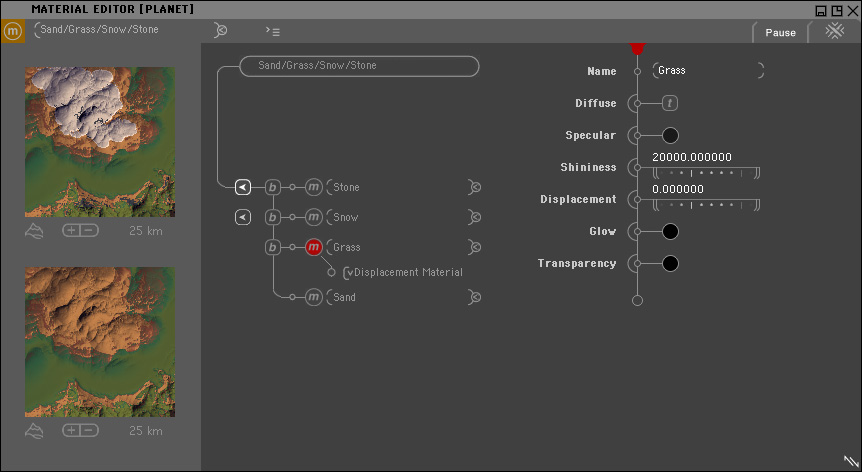
Material editor with a material selected. The renderings on the left represent: Output Material at the TOP; Selected Material or Texture on the BOTTOM.
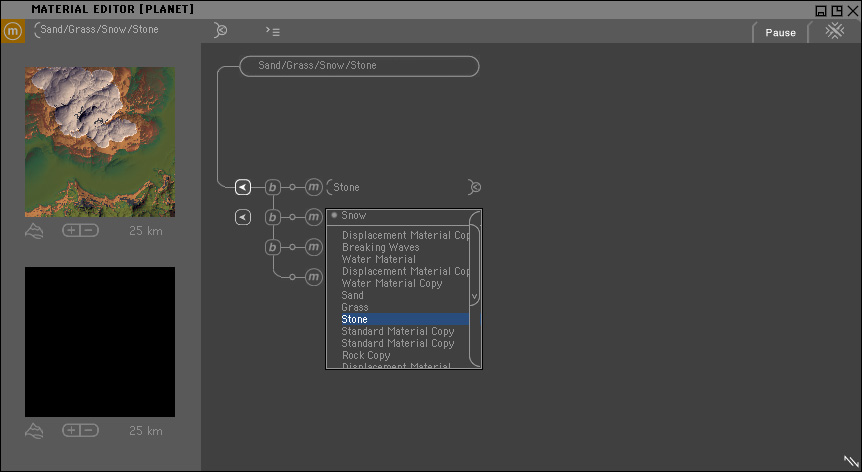
Materials and textures resided at the “leaves” on the node tree. Tapping a node would reveal it’s parameters on the stem on the right. Each material leaf could choose a preset, or be edited to establish a new look. The material type was set from a pick list immediately under the selected leaf.
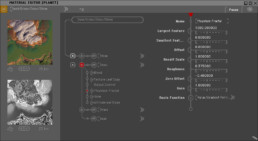
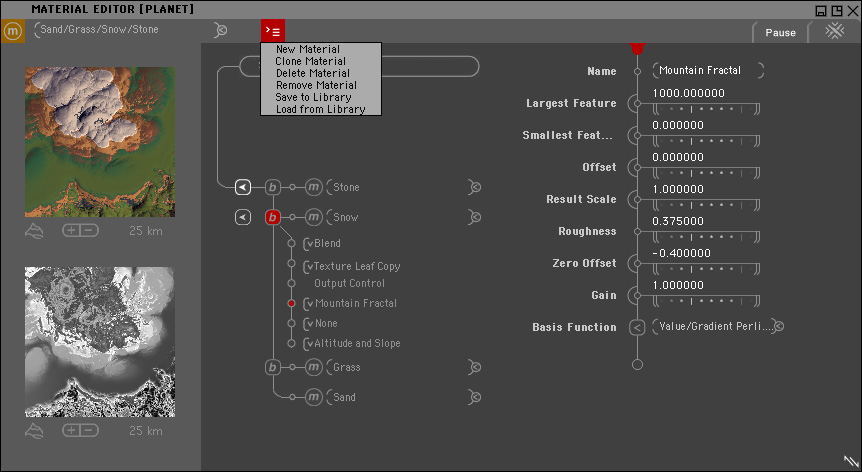
Material Editor with a blend node selected. Note that the BOTTOM render on the left shows only a grayscale rendering of the selected Texture.
Selecting a blend would reveal the type of blend function providing presets for how the blend would be calculated from geometry and with the other materials and textures in the material editor. By using the available presets and tuning their values, complex materials such as snow appearing above a certain altitude, only on more horizontal surfaces could be achieved.
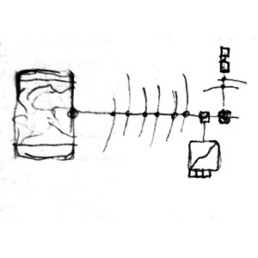
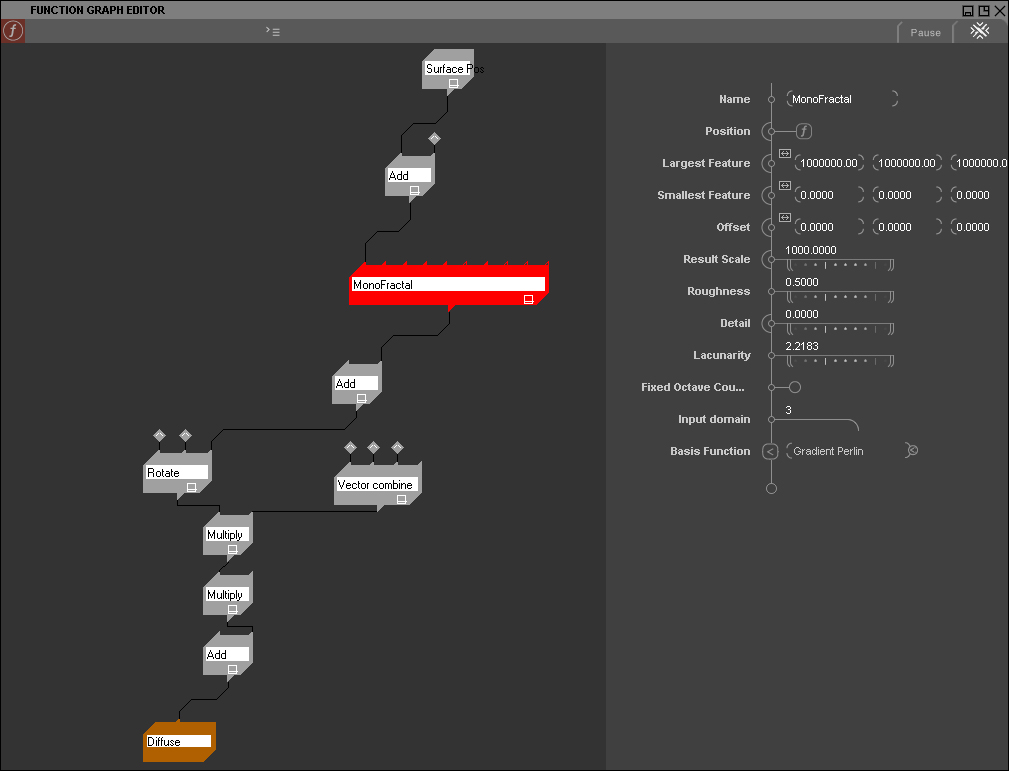
The following sketches show ideation development for the Material and Texture editor using a hybrid graph / control interface.
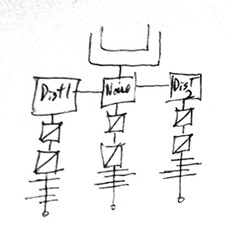
1. Noise function blending graph
2. Contextual renders of connected functions

3. Blending Graph study for Material graph template
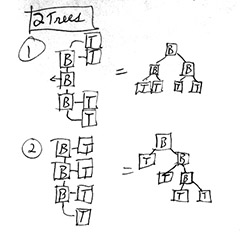
4. Two graph types for material template graphs
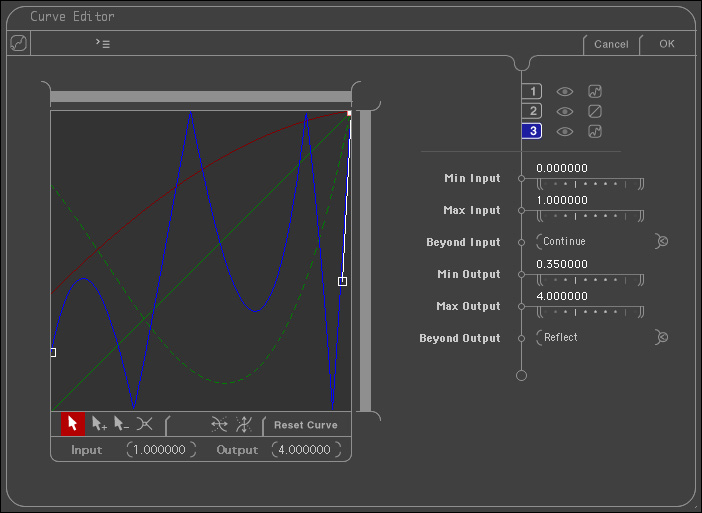
Gradients
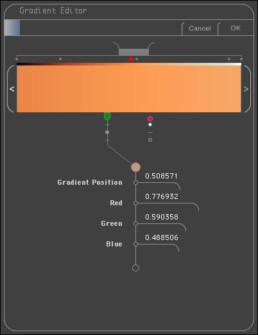
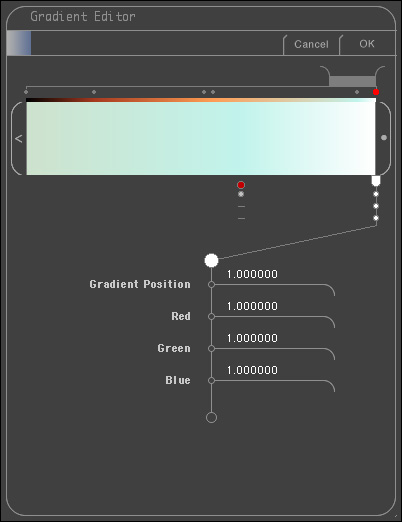
For the gradient editor, I leveraged the design language of the vertical stem for parameter control, and a horizontal bar for the gradient representation. Placing knots at locations on the gradient the artist could tune the variation in color over the gradient. Selection of a knot connected that knot to the stem and revealed the color values for the knot.

The Gradient Editor with a knot selected on the gradient.
Additionally each knot had a toggle to bypass any of the 3 color channels. Bypassing the knot for a given channel would ignore the value set for the channel at that knot. This enabled the artist to achieve complex tuning of the gradient without affecting all color channels simultaneously.
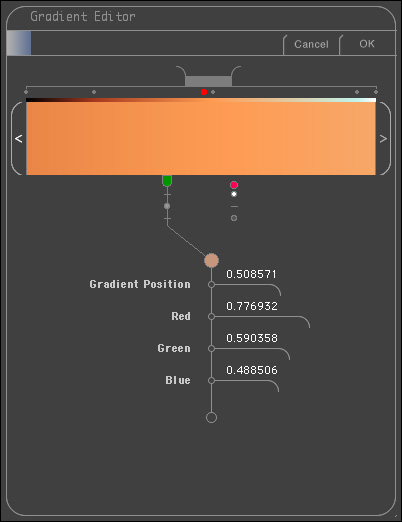
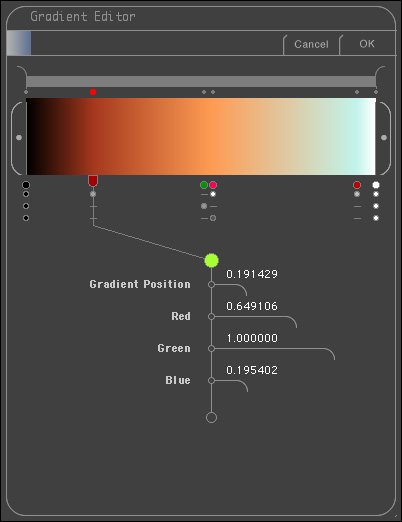
In Mojoworld, space was calculated in real-world scales. The vast difference between a variation in color on a rock, cliffs with strata, and planet sized gradients required a different approach to color gradients to enable colorspace variations at vastly different scales. To allow an artist to control such vastly different scales, I included a “zoom” control slider to isolate a portion of the gradient within the view. The “calipers” of the zoom control acted as a window scroller. The artist could scroll horizontally to view different sections of the gradient as they tuned their gradient.
The Gradient Editor zoomed into a portion of the gradient.
The following development sketches for UI show the ideation process on tool functionality and representation structures.
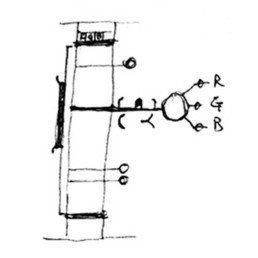
1. Gradient knots in a vertical scalable interface

2. Gradient knots as a “Color Chord” in a horizontal gradient
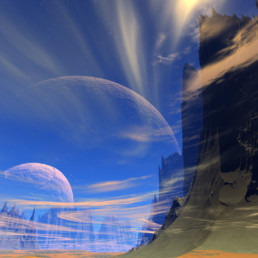
Multiple moons visible in the sky beyond the atmosphere
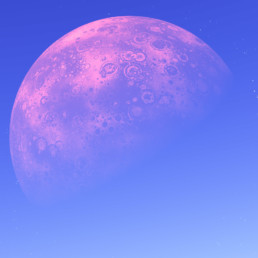
Moons have materials controlled by textures.
Moons
MojoWorld had moons which were orbiting the world. To control them, the Moon Editor was created. As an editor, the workflow followed the same principles as a gradient editor, with a horizontal bar representing distance from the center of the world. Moons could be added and removed. Moons had materials and textures enabling realistic and sophisticated effects. Each moon had a render object, and since MojoWorld provided a means to import 3D objects, any model could be made to render in place of the moon, such as a teapot. Moons were rendered outside the local atmosphere of the planet. How they appeared in the final render was dependent on time of day, distance from the horizon, and attitude in relation to the sun.
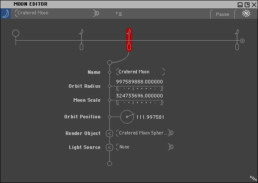
The Moon editor with one of 3 moons selected.
This sketch for the Moon editor shows the connection of the stem to the currently selected moon. The original sketches and feature set considered a planetary ring as one of the features.
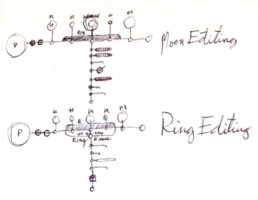
Moon and Ring editing using the stem control concept
States Editor showing States, Settings, and the Hyperspace Mixer.
Hyperspace
MojoWorld had a large number of parameters to control each world. We wanted to create an accessible and powerful method to affect high level control for a MojoWorld file.
The initial requirement was to have some set of controls that would affect specific aspects of the current world file. We faced a challenge in that the planets themselves did not all have the same set of parameters. The underlying parameter set was intentionally flexible to provide the greatest amount of freedom to the artists creating new worlds. We also noted that not every world file would require the same set of high level controls.
Transmutation affordances for navigating high dimensional space
With these challenges in mind, I proposed a workflow model which would enable the greatest flexibility, be easy to use, and straightforward to implement. The workflow involved the following steps:
-
The artist sets a “Home” state of the world.
-
The artist edits the world with any number of parameter changes making a new “State” of the world. This could include any settings on any object in the world: mountain height, material settings, sky and water levels and textures, etc.
-
The artist declares the new state of the world and gives the state a name.
-
A new slider appears in the interface letting the artist change the amount of influence that State has on the world.
-
The artist returns to the Home state by setting the slider to “0” and repeats the process to adjust the world and set a new state.
Each time the artist declared a new state, the current set of parameters in the scene was compared to the Home state. When recording the new State, only the changed parameter values were stored for the current state. Importantly, a State only needed to control parameters which were influenced by the State. This resulted in the ability to “Mix” different states to alter the world in unprecedented ways. We could provide simple controls for transmutation of the parameter space in any number of dimensions. The artist could create however many states they wanted and freely mix and blend their effects to explore the high dimensional space more easily.
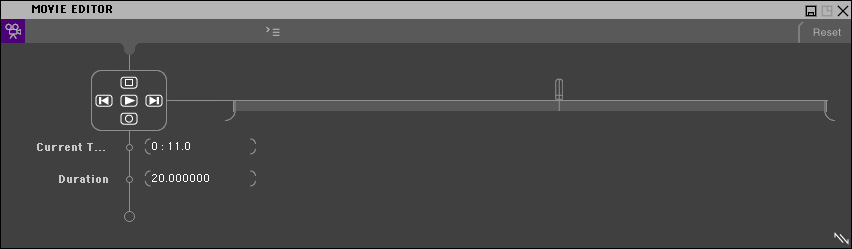
The example below illustrates a simple transmutation of 2 dimensions.
In the animated example below, there are 3 states animated to show the morphologic effect of altering parameters on the world file asynchronously.
Leveraging this approach, provided powerful yet simple control for the artist declare a new state and control their world. Since all the learned interactions for world editing were the same, there was no modality or special workflow necessary to enable this capability other than the set of actions needed to declare a state. In UX design adding a capability is nearly always better than inserting a modality: learned interactions remain unchanged and new functionality is gained.
With a nearly unlimited amount of control in the Hyperspace Mixer, we quickly realized it was valuable to save Settings of the world in order to quickly jump between setups. The States included a description field. Both the Settings and Descriptions were saved in the file and visible in the free Transporter application.
Below are sketches from the process of evaluating different workflow and representation and control models.
Paint blending approach.
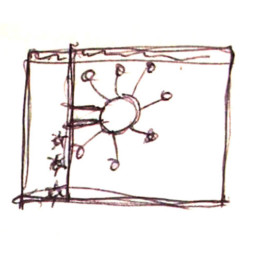
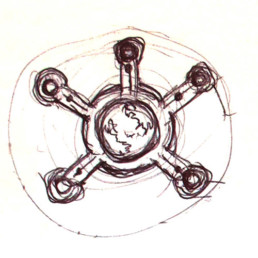
Star configuration as a pop-out from the tools pane.
Sketches for the Transporter implementation of the Hyperspace Mixer.
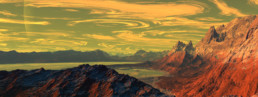
Renderings
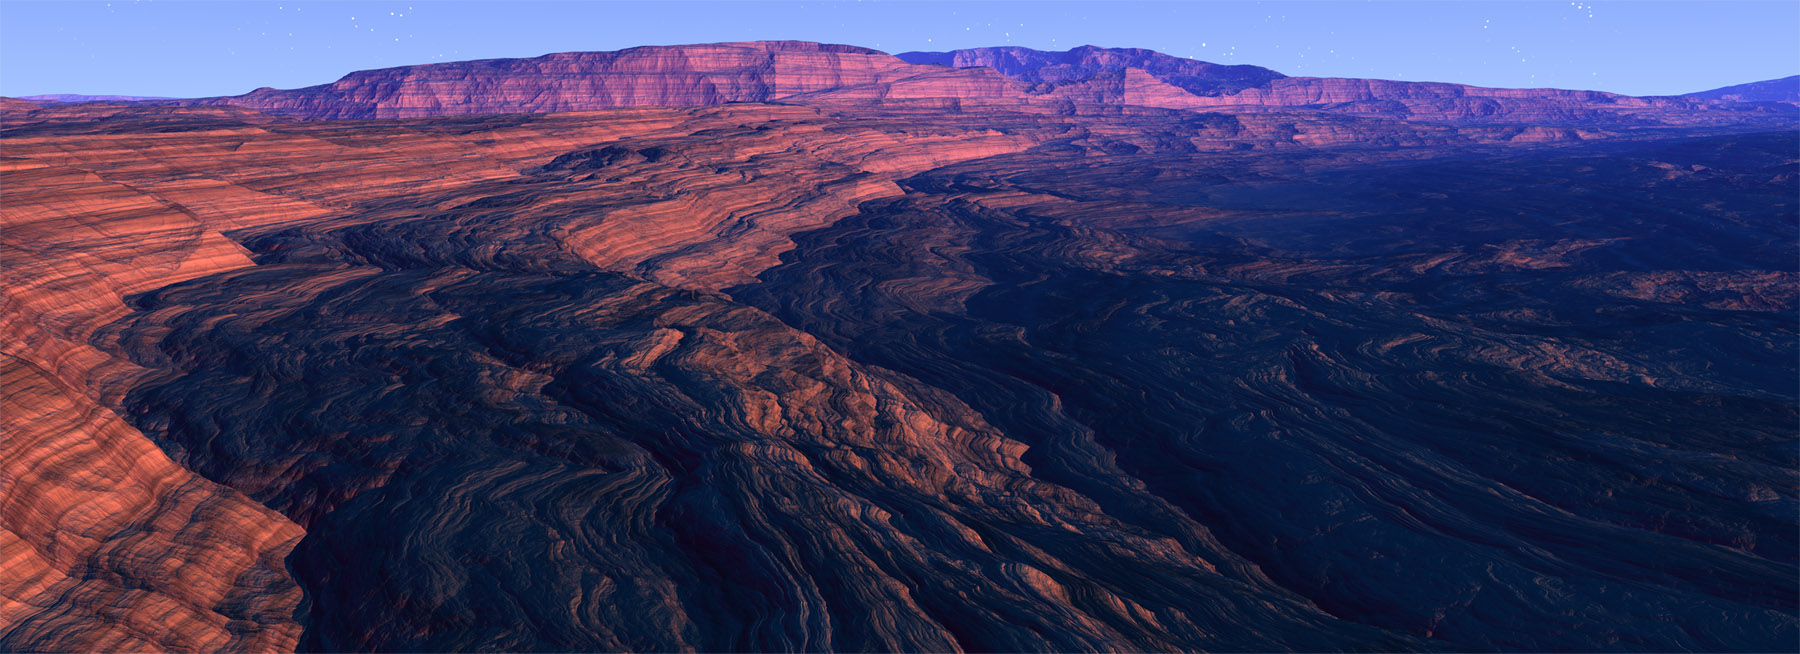


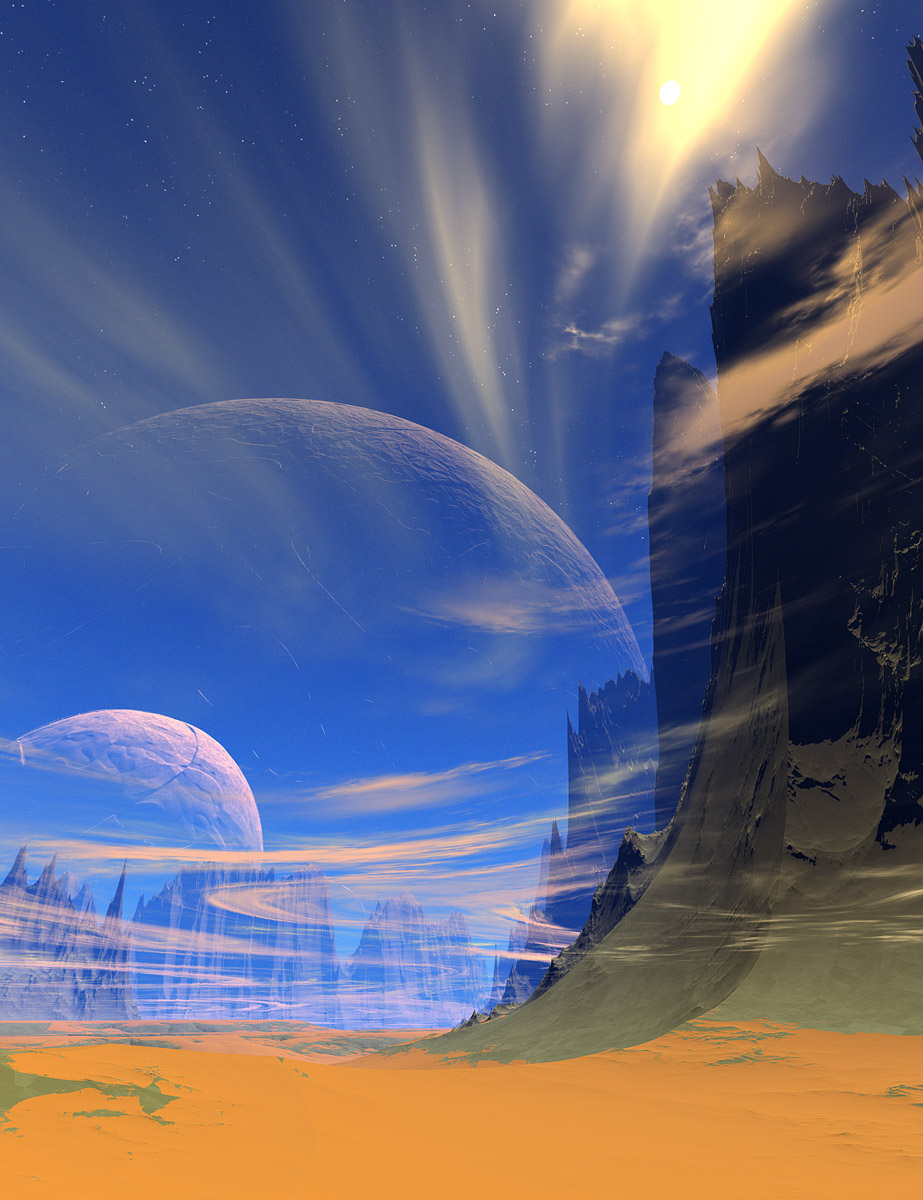
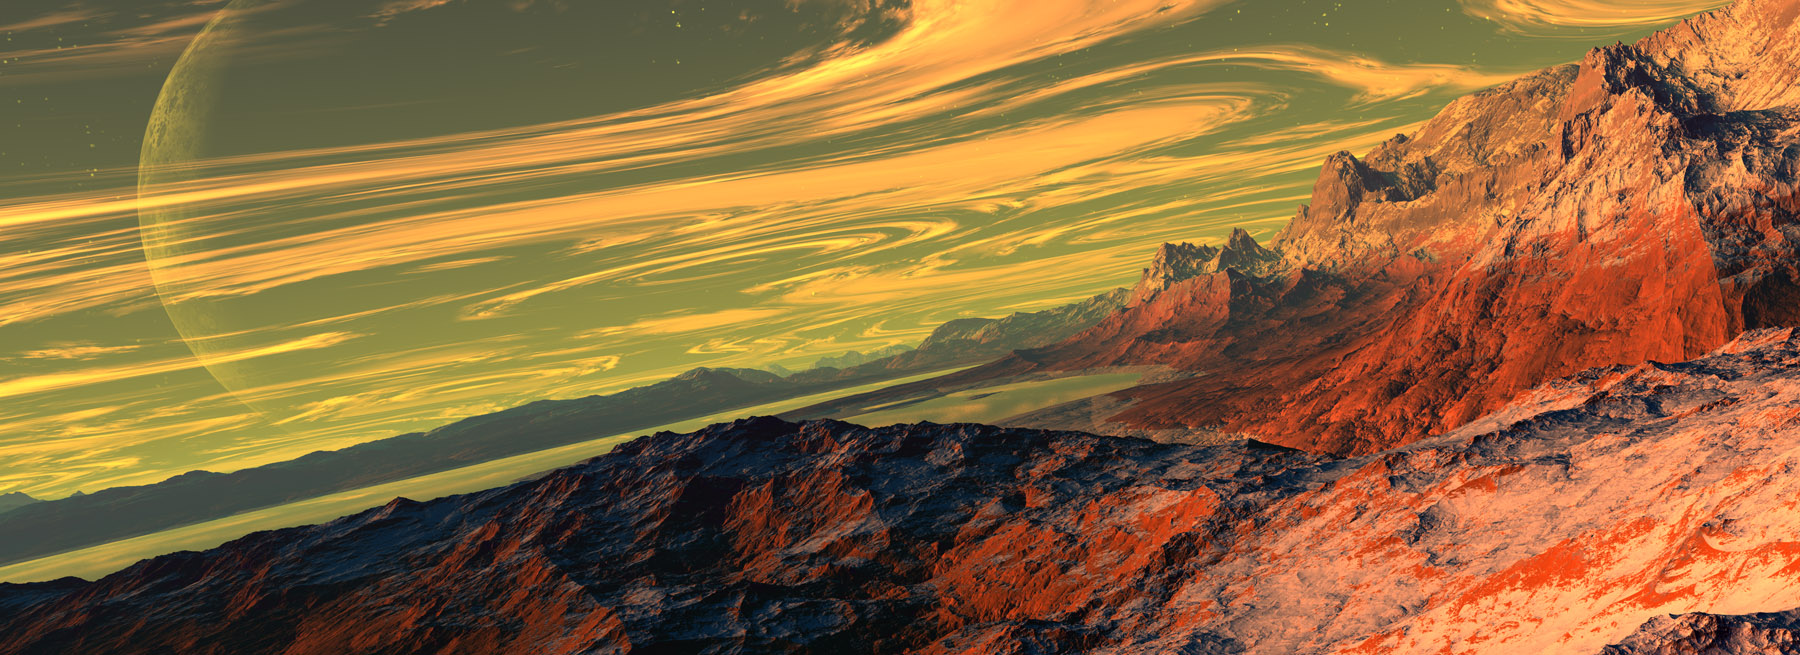

Images rendered from MojoWorld.
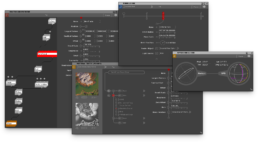
Editors


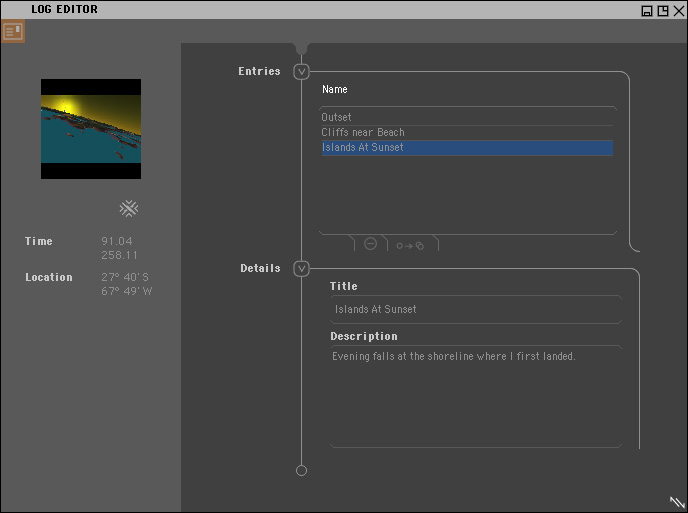


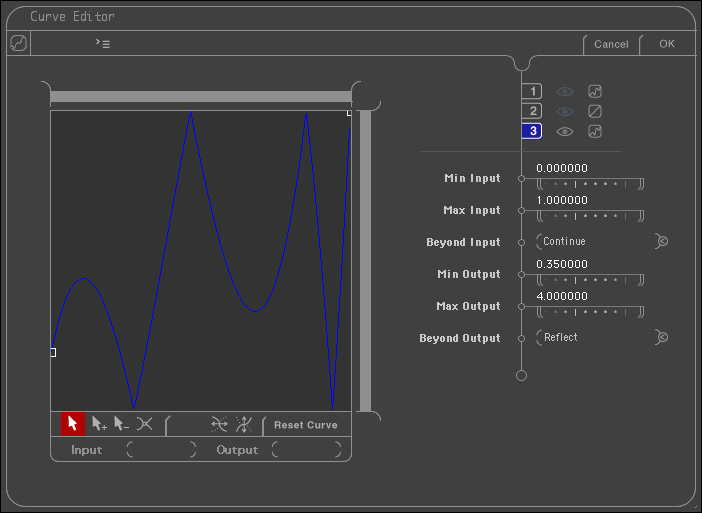
Various editors created for MojoWorld – Nearspace.